Record and Upload Videos Online for Research
From recording equipment to on-camera confidence, follow these four steps to record pro-looking videos for your online course.
You accept an idea for your online course. You lot're passionate about the subject, and you tin can't look to start pedagogy new students and sharing your expertise with the globe.
But before you can start selling online courses , you have to create your online course content.
And to create an engaging online form , yous demand to brand some videos.
Video is the "gold standard" for online form content. Video content is multi-sensory — students encounter and hear your content — making information technology more interesting and memorable.
If recording video content sounds intimidating, don't worry. You don't need pricey gear or years of on-camera experience to brand loftier-quality videos for your online course.
In fact, you can do it all from domicile.
In this guide, nosotros'll take you through every pace of the video recording process, from choosing the right equipment to feeling confident on camera, and everything in between.
Step #1: Gather your gear
When it comes to your video recording setup, the right gear makes a big divergence. At that place are a ton of options out in that location, and figuring out which tools to use can be fourth dimension-consuming and disruptive.
Good news: Y'all don't need a professional studio or high-priced recording equipment to create videos for your online course.
Hither are some of our favorite cameras, mics, and lighting options that won't break the bank. (Note: Prices are accurate as of the fourth dimension of writing.)
Microphones
Audio quality is an essential part of your online grade videos. TechSmith found that 75% of videos that viewers rated equally "good" or "groovy" had clear voiceover audio.

If your audition can't hear y'all or yous accept a lot of background racket, your students probably won't stick around for the whole video — or finish your online course.
For the clearest sound, we recommend using an external microphone rather than the one built into your estimator.
You'll come across 2 main types of microphones: Dynamic and condenser .
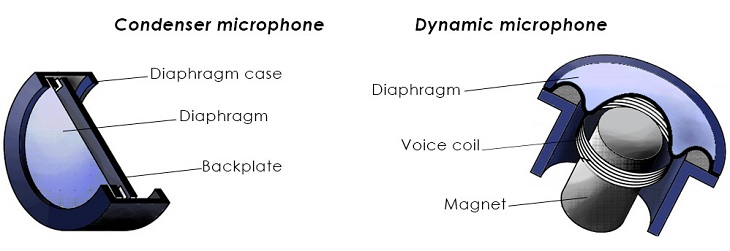
Dynamic mics smooth over phonation imperfections and isolate your vocalisation, and so you don't have to worry as much about ambient noise or acoustics.
Condenser mics pick upwardly sound with more detail and accuracy, making them a solid choice for studio-blazon environments that don't accept a lot of background racket.
For a deeper dive into different mic options, bank check out this guide to the all-time microphone setups for online courses and webinars .
In the meantime, here are 4 of our top microphone recommendations.
i. Blue Yeti USB microphone ($129.99)

The Blue Yeti is one of the almost popular condenser mics for content creators. It hooks upward easily to your computer via USB, and you lot can add on a boom arm to "transform your desktop into a broadcast studio".
ii. Blueish Snowball ($69.99)

The Blue Snowball is a less expensive condenser microphone choice. It promises "studio-quality sound" via a plug-and-play USB connexion.
3. Shure MV88 ($149)

If you plan to record videos via your iPhone or iPad, this super-portable mic is a solid choice. The Shure MV88 mic connects to your iOS device with a built-in lightning connector.
4. Rode SmartLav+ ($68.87)

Lavalier microphones clip correct onto your lapel. This mic from Rode is an excellent hands-costless option for creators who move around a lot while teaching, like fitness instructors. Just clip on the mic and plug it into the headphone jack of your smartphone.
Now that we've covered the sound piece, let's move on to another major component of recording quality videos: your camera.
Cameras
Let's start with some good news: You may not demand to buy an external webcam for your online course videos at all. Many smartphone cameras are at least 1080p, if not 4K. (Translation: They're loftier-quality cameras.)
If you lot have an iPhone, check out this guide to recording high-quality video on an iPhone , or this video tutorial on filming your online course with an iPhone.
On the other hand, if you lot're recording on your computer, you lot'll want to use a camera with a higher resolution than the built-in i.
Here are some of our pinnacle webcam picks.
ane. Logitech Hard disk Pro C920 ($81.95)

The Logitech Hd Pro C920 is an affordable external webcam. This camera offers 1080p video and works with most Windows, macOS, and Chrome OS computers via USB.
ii. Logitech BRIO ($199.99)
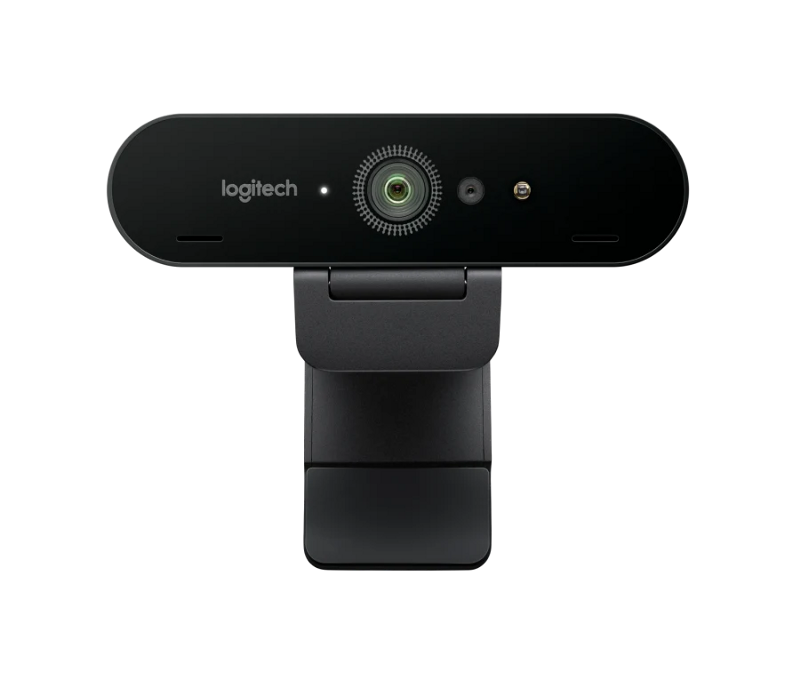
The Logitech BRIO is another great webcam option. It's on the pricier side, but offers 4K video and comes highly rated for streaming, video conferencing, and recording.
3. Elgato Cam Link 4K ($129.99)

If yous already accept a DSLR camera, you can apply it to record your online class videos with the Elgato Cam Link 4K. This bully tool converts the HDMI signal from your DSLR camera to USB, and then your computer recognizes it as a webcam.
(To make the most of this setup, check out our video on the all-time DSLR settings for online course videos .)
Bonus: AmazonBasics Lightweight Mount Photographic camera Stand ($15.70)

Whether you use a smartphone, DSLR camera, or webcam, y'all may likewise want to invest in a tripod.
Cameras often pick up extra motion from whatever surface they're sitting on, which can make your shot look shaky. A tripod helps you stabilize your photographic camera for a steady shot.
Final but not to the lowest degree, let's go into some lighting recommendations.
Lighting
We'll cover the "hows" of lighting your online class videos in the next section, only first, here are the "whats". What lighting equipment should you go?
We recommend having at least a basic lighting setup so that you can shoot video whenever you desire to, without waiting for the natural lite to be just right.
Here are some lights we recommend.
one. Neewer 18" Ring Lite ($89.99)

Ring lights eliminate shadows past placing calorie-free all around your camera. This Neewer kit features dimmable LED lights and two color filters, and can fifty-fifty work as a tripod.
2. Fovitec Softbox Professional Lighting Kit ($189.95)
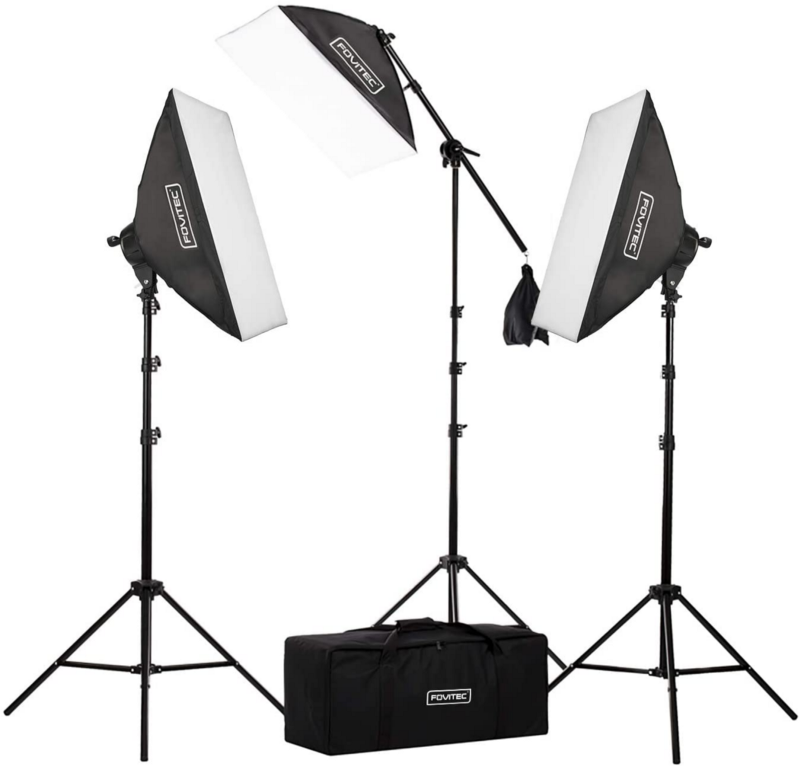
If you want to spend a bit more and get a picayune bit fancier, you tin can go a three-indicate lighting setup similar this Fovitec's set of fluorescent softbox lights. The kit comes with 3 softboxes, 11 45W bulbs, three calorie-free stands, i nail arm, and a carrying bag.
three. Lume Cube Broadcast Lighting Set ($99.95)

The Lume Cube lighting kit offers a tabletop lighting option that you lot can apply with your webcam, smartphone camera, or DSLR camera.
OK, at present that y'all have all of your gear on hand (or at least on your shopping listing), information technology's time to get it all fix in the infinite you'll apply to record.
Step #2: Set your space
For in-person educators, creating a keen learning environment is disquisitional to their students' success.
The same is true for online courses. An academic study on online learning found that people prefer educational videos filmed in an informal setting vs. big-budget studio productions.
So instead of thinking about your filming spot every bit a moving picture set, think most it as a classroom. Cull and set up your infinite with your students' experience in mind.
Hither are some tips for deciding where to film your course videos from our resident video expert, Ben:
-
Cull a setting that matches your course topic. For example, y'all could moving picture a fitness class in a home gym, or a cooking course in your kitchen.
-
Consider the energy in the room. Vibrant colors and background movement can create a high-energy environs, while a unproblematic color palette and static background convey a more than restful space.
-
Create an immersive feel. Include items in your shot that reinforce your brand and topic. If y'all teach art, show your supplies in frame, like Emma Jane Lefebvre does in this tutorial for painting wildflowers .

Another of import chemical element when setting the scene for your video is lighting.
You lot have two options for lighting your videos: tabletop lighting and studio lighting.
Tabletop lighting is what most course creators use for "talking caput" videos. You face the camera, and the low-cal faces you. Information technology's perfect for a shut-up shot and only requires one calorie-free.
Studio lighting, like a three-point lighting setup, is a little bit more than elaborate:

A three- (or 4- or five-) point setup gives you lot ultimate command over your lighting qualities and works well in larger indoor pedagogy environments.
For more than details on all things lighting, cheque out these resources:
-
A guide to the best lighting setup for online courses
-
Video: How to light your talking caput videos like a pro (including calorie-free and colour limerick)
-
Video: Three-point lighting tutorial
Before we move on, go along this in mind:
Your recording setup doesn't have to be perfect for y'all to create stellar course content that your audience will dear. Research shows that production quality ranks behind perceived learning, commitment style, and fifty-fifty video length equally reasons people like educational videos.
In other words, your video content matters more than having a studio-quality recording. Now, it's time to plan out that content.
Pace #3: Program out your video content
Planning your video content out before yous hit record can proceed you from overshooting footage, tacking on hours of extra editing fourth dimension, or forgetting to cover an important part of your lesson.
To brand more engaging course videos , Podia's video content marketer, Ben, recommends outlining your content alee of time:
"When you outline your content, it's a lot easier to create a clear structure. A first, middle, and end. Humans similar structure, especially when they're trying to acquire new content."
Check out this video if you need help outlining your online course content . You can also download our complimentary class outline template .

When your videos are structured and clear, it'south easier for your pupil to blot the information and stay engaged.
Later on y'all complete your outline, decide whether you desire to write out a full script for each video or merely employ a few bullet points. A script helps you refrain from using filler words or rambling on virtually one signal, then skipping another.
Plus, if you're nervous nearly existence on camera, having a script just out of frame or on a teleprompter can assist heave your confidence and keep you from freezing up.
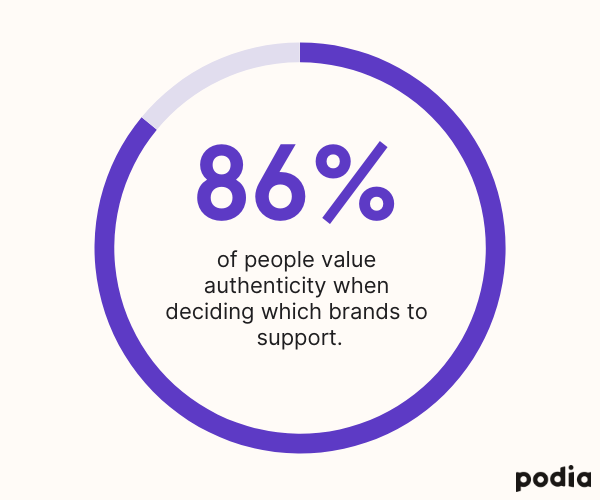
Just make sure you're not staring straight at and conspicuously reading from a script. People want to meet your real personality, not a robot. 86% of consumers say that authenticity is a cardinal gene when deciding what brands they like and back up.
Your tone and linguistic communication also play a big role in coming beyond as authentic.
Whether yous use bullet points to stay on runway or read from a fleshed-out script, keep it conversational and apply uncomplicated language.
One study found that jargon tin can kill involvement in complex subjects. And enquiry on instructional videos shows that a conversational tone can create "a sense of social partnership between student and instructor, prompting the student to effort harder to make sense of the lesson".
In other words, write similar you're explaining your topic to a friend rather than giving a lecture.
(Check out this video on how to write a more authentic video script for more than tips.)
Planning out your video content besides means figuring out how long each video will be.
Resist the temptation to cram as well much data into a single video lesson. Instead, break each lesson into smaller, more digestible pieces. If y'all're explaining a six-step process, consider creating six separate videos.
Your students will acquire the same information, but you lot're less likely to lose their attention mid-video . And more students finishing each lesson ways that more people are learning and benefitting from your course.
Effort to stick to six minutes or less per video. A large-scale study from researchers at MIT found that videos shorter than half-dozen minutes concur viewers' attention longer, which means more students end each lesson .
For example, check out the length of each video in Coding Is for Losers' form, Data Assay the Lazy Way .
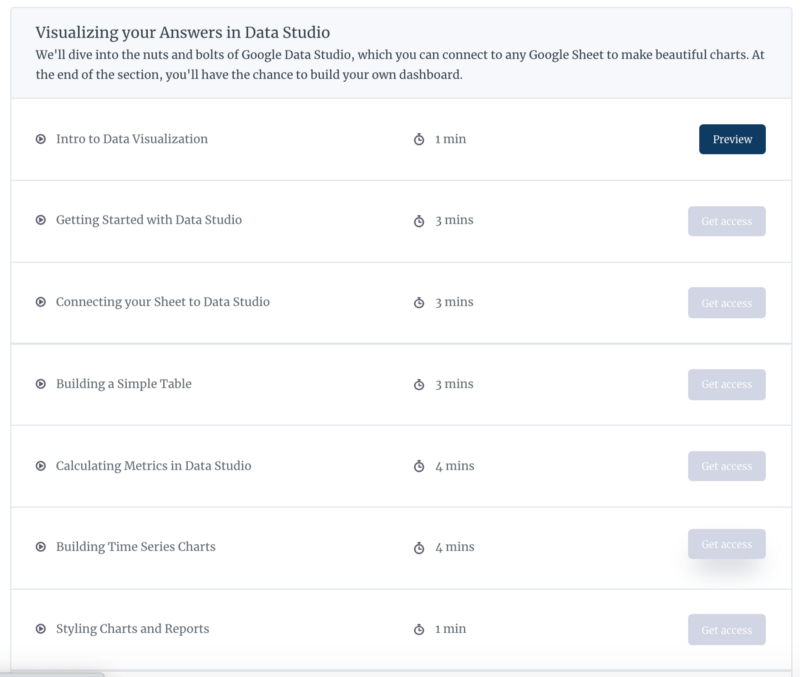
CIFL could have made all vii parts of the lesson into ane longer video. Merely by breaking it up into bite-size chunks, they make the content more manageable and keep their students engaged from 1 part to the next.
(Desire to create, launch, and sell an online form like CIFL? Become started with a gratis 14-24-hour interval trial of Podia .)
OK, with all your content planned out, the time has finally come. Allow'due south record some online course videos.
Step #4: Record your online course videos
Yous're feeling ready.
You lot get in front of the camera, hit record, and you're suddenly hit with a wave of stage fright.
That's totally normal. A lot of people — even confident, experienced presenters — freeze in front of the camera lens when it comes time to hit record.
Offset and foremost, when yous observe yourself struggling to overcome self-doubt , remember that your audience doesn't look yous to exist perfect.
They're not taking your class to watch a perfectly polished expert. They're taking your class because they're passionate near the subject and they want to learn from you.

That said, there are some tried-and-true ways to feel more confident on photographic camera and stop dreading every recording session.
Ane of our number one tips is to practice, practice, practice.
You tin exercise in front of a mirror. Talk through your bullet points or script as though you're presenting to your students. Watch your body language and how much time you take getting through the content.
Another option is to record yourself practicing your video content and look for things to improve. Just make sure to exist kind to yourself. Odds are, y'all're your own harshest critic.
On the technical side, make sure to test out your audio and video before you start recording. There's null worse than recording a full lesson's worth of content, just to find that your microphone wasn't plugged in or the lighting is manner off.
After you tape your video, consider adding screen recordings. If part of your grade involves demoing something like coding or Photoshop, showing your reckoner screen can help make your tutorial easier to follow.
For case, First in Compages uses screen recordings and voiceovers in their course, Photoshop for Architects .

Here are some screen capture software options we recommend:
-
Apowersoft Gratuitous Online Screen Recorder (Free): Easy to utilize with no time limits or watermarks.
-
ScreenFlow ($129 after free trial): Loftier-quality screen recordings and audio capture, plus editing tools. Mac-just.
-
Camtasia ($249.99 after free trial): Lets you both record your screen and edit those recordings with special effects, royalty-gratis music, and more.
And a few sound recording tools for adding voiceovers:
-
Brazenness (Free): Easy-to-use audio editor and recorder with basic editing and mixing capabilities.
-
Adobe Audition ($20.99/month later on free trial): Part of Adobe'due south Creative Deject. A "digital sound workstation" with editing, mixing, and recording features.
-
Logic Pro ($199.99 later on free trial): Advanced recording, editing, and audio mixing tool with tons of features. Mac-only.

Concluding but not to the lowest degree, you lot'll need to edit your videos. Here are some of our top picks for video editing software:
-
HitFilm Express (Free): A fully-featured post-production and editing suite with visual effects, transitions, titles, and more.
-
Adobe Premiere Pro ($20.99/mo after free trial): Part of Adobe's Creative Deject. Professional video editing features include effects and transitions, animation, color correction, and more than.
-
Final Cut Pro ($299.99 later free trial): Advanced-level editing software featuring fast performance, organizational tools, and back up for 360-degree footage and HDR. Mac-just.

Video and audio editing tin seem intimidating. We won't get into the ins and outs of editing in this commodity, just know that if you have the budget, you tin outsource the job to a video editor.
If non, don't worry. Check out these six good video editing tips you tin can larn in a weekend.
One time you lot tape and edit your videos, you're ready to upload them to your online course platform.
Podia's elevate-and-drop uploader makes it easy to upload and publish video content for your online courses in just a few clicks.

You tin can likewise add new content to your courses later they're published, giving current and new students real-time access to your latest additions.
Just don't just take my word for it — see for yourself in our weekly demo.
Lights, camera, online course action
Recording video for your online class can seem daunting, but it doesn't take to be. Past post-obit the tips and techniques in this guide, you'll be well on your way to creating video lessons your students volition love.
To recap, hither are the 4 steps to tape pro online course videos at domicile:
-
Assemble your gear. The right camera and microphone tin make a big deviation, just yous don't need to spend an arm and a leg on equipment.
-
Ready your space. Choose the correct setting to record your video and brand sure that your lighting setup is on-signal.
-
Plan out your content. Whether yous determine to write a full script or stick to a few bullet points, use a conversational tone and skip the jargon. Keep your videos under six minutes long.
-
Tape your online class. Practise your content ahead of time to feel more than confident. Afterward recording, add screen recordings and voiceovers for an fifty-fifty more compelling video.
Now go out there and offset sharing your expertise with the world. We tin can't look to watch you lot succeed — on photographic camera and off.
Source: https://www.podia.com/articles/how-to-record-videos-for-online-courses
Post a Comment for "Record and Upload Videos Online for Research"